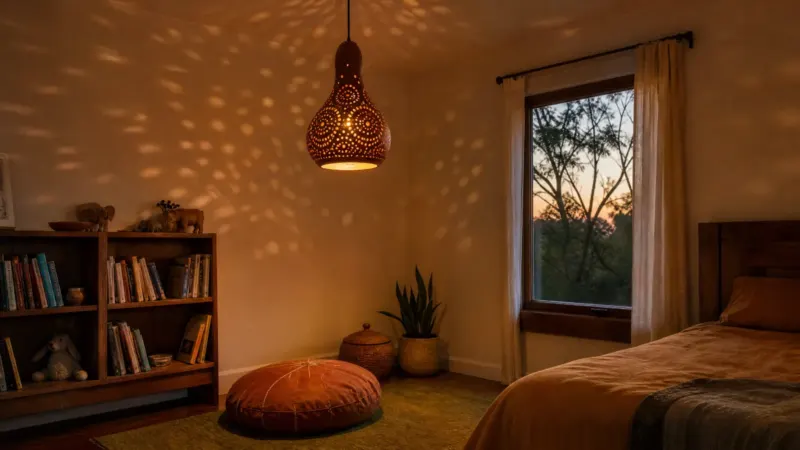
How to Make a Gourd Lamp: A Step-by-Step Guide

Ever wondered how to make a gourd lamp? These glowing, handmade lamps turn a humble dried gourd into a piece of art that scatters warm, patterned light across a room. Making one takes patience, but the steps are simple once you know them. Here is a complete, beginner-friendly, step-by-step guide, plus tips and answers to the questions people ask most.
How to make a gourd lamp: the full sequence
- A hard, fully dried gourd
- A pencil for sketching your pattern
- A rotary tool or hand drill with a set of fine bits
- Coloured glass or plastic beads
- A certified lamp kit (socket, cord, switch and plug)
- Clear varnish, sandpaper, and a dust mask for safety
Step 1: Choose the right gourd
Hard-shelled bottle gourds (also called calabash gourds) are the best gourds to grow for lamps because they dry into a strong, hollow shell. If you are growing your own, pick large, evenly shaped gourds and let them ripen fully on the vine before harvesting.
Step 2: Dry the gourd
Drying is the most important step. Leave the gourd in a dry, airy place for several months, turning it occasionally, until it feels light and the seeds rattle inside. A properly dried gourd is essential; if it is still soft, it will not hold a clean pattern.
Step 3: Clean and prepare the gourd
Soak the gourd in warm water, scrape off the flaky outer skin, then cut a small opening in the base to remove the seeds and pulp. Sand the shell smooth inside and out so it is ready to drill.
Step 4: Draw your pattern
Sketch your design in pencil directly onto the shell. Flowers, stars, spirals and geometric mosaics all work beautifully. Simple, repeating patterns are the easiest for your first gourd lamp, and you can always add detail as you gain confidence.
Step 5: Drill the holes (how to carve a gourd lamp)
Wearing a dust mask, carefully drill along your pencil lines with fine bits. Mix hole sizes to control how much light escapes: smaller holes for delicate detail, larger holes where you want the light to shine through brightly. Take your time here, because this is what creates the magical mosaic glow.
Step 6: Add beads for colour
Glue coloured beads into some of the larger holes. As the light passes through, the beads glow like tiny jewels and add rich colour to the pattern. Mix warm and cool colours for the most striking effect.
Step 7: Wire, varnish and finish
Fit a certified lamp kit through the base opening, add a low-wattage LED bulb, and seal the gourd with a coat of clear varnish to protect it. Always use a proper lamp kit and the correct plug for your country. Never use a high-wattage bulb, which can overheat the shell.
How to make a hanging gourd lamp or gourd lamp shade
To make a hanging gourd lamp, use a pendant lamp kit and add a chain or cord so it can hang from the ceiling. To make a gourd lamp shade instead, leave the top open and fit the gourd over an existing bulb and fixture. The drilling and beading steps stay exactly the same.
Tips for your first gourd lamp
- Start with a simple pattern and a medium-sized gourd.
- Keep your drill bits sharp for clean holes.
- Work slowly to avoid cracking the shell.
- Always use an LED bulb to keep the lamp cool and safe.
Why make a gourd lamp?
Gourd lamps are one of the oldest forms of natural lighting, crafted for generations along the Mediterranean and Aegean coasts and across Africa and Asia. Turning a simple dried gourd into a glowing work of art is deeply satisfying, and the result is a completely unique, eco-friendly lamp that no factory can copy. Because each gourd grows differently, your lamp will have its own shape, character and pattern of light. It is also a sustainable craft: the gourd is a natural, renewable material, and a well-made lamp will last for years while filling your home with a warm, handmade glow.
Prefer a ready-made gourd lamp?
Making a gourd lamp is rewarding, but it takes months of drying and hours of careful work. If you would rather bring the glow home today, every lamp in our handmade gourd lamp collection is crafted by skilled artisans and ships worldwide. Explore our desktop lamps and chandeliers to find your favourite.
Frequently asked questions about making a gourd lamp
What gourds are best for making lamps?
Hard-shelled bottle gourds, also called calabash gourds, are best because they dry into a strong, hollow shell that holds a drilled pattern well.
How long does it take to dry a gourd for a lamp?
Usually three to six months, depending on size and climate. The gourd is ready when it feels light and the seeds rattle inside.
How do you make a hanging gourd lamp?
Follow the same drilling and beading steps, then fit a pendant lamp kit with a chain or cord so the finished gourd can hang from the ceiling.
What tools do you need to make a gourd lamp?
A rotary tool or hand drill with fine bits, sandpaper, a pencil, beads, a certified lamp kit, varnish and a dust mask.
Is it hard to make a gourd lamp?
The steps are simple, but drilling hundreds of holes by hand takes patience and a steady hand. Start with a small, simple design for your first attempt, or buy a ready-made handmade gourd lamp if you would rather skip the work.
Can you paint or stain a gourd lamp?
Yes. Many makers stain or lightly paint the gourd before varnishing to deepen its natural colour or add contrast around the pattern. Keep finishes thin so they do not clog the drilled holes.
How do you clean a finished gourd lamp?
Unplug the lamp, then dust gently with a soft, dry brush or cool air from a hair dryer to reach between the beads. Avoid water and harsh cleaners, which can damage the varnish and the natural shell.